An aluminum boat is a prized possession, but over time, it may develop leaks that need to be addressed. In this guide, we will walk you through the step-by-step process of repairing a leaking aluminum boat. By following these instructions, you can ensure that your boat remains watertight and in optimal condition.

Step 1: Identify the Source of the Leak
Before you begin any repair work, it is crucial to identify the source of the leak. Inspecting the hull and locating potential areas of leakage is the first step in this process. Start by closely examining all seams, rivets, and joints for signs of corrosion or damage. Look for water stains, drips, or damp spots inside the boat that can indicate where the leak is originating from. This careful inspection will help you pinpoint the exact location that needs repair.
In addition to visual inspection, there are other methods you can use to identify leaks. One popular technique involves pressurizing the hull with an air compressor and applying soapy water to observe bubbles forming at the site of leaks. This method can be particularly useful if visually identifying leaks proves challenging.
By accurately determining the source of the leak, you can focus your repair efforts on those specific areas and achieve more efficient and effective results.
Step 2: Prepare the Surface for Repair
Preparing the surface around the leak before starting repairs is essential for ensuring a successful outcome. Begin by thoroughly cleaning the area using a mild detergent and water solution to remove any dirt, grime, or residue. Use a scrub brush or sponge to gently scrub away stubborn debris.
Once clean, rinse off all soap residues with fresh water and dry the area completely using clean towels or a cloth. Ensuring a dry surface is vital as it allows for better adhesion of the repair materials.
If there are any loose or damaged sealant or caulking, remove them carefully using appropriate tools such as a scraper or a putty knife. Make sure to remove all traces of the old sealant, leaving a clean and smooth surface ready for repair.
Properly preparing the surface will create optimal conditions for the repair materials to bond effectively and provide long-lasting results.
Step 3: Select an Appropriate Repair Method
Choosing the right repair method depends on factors such as the size and severity of the leak, as well as personal preference and experience. There are several common repair methods you can consider:
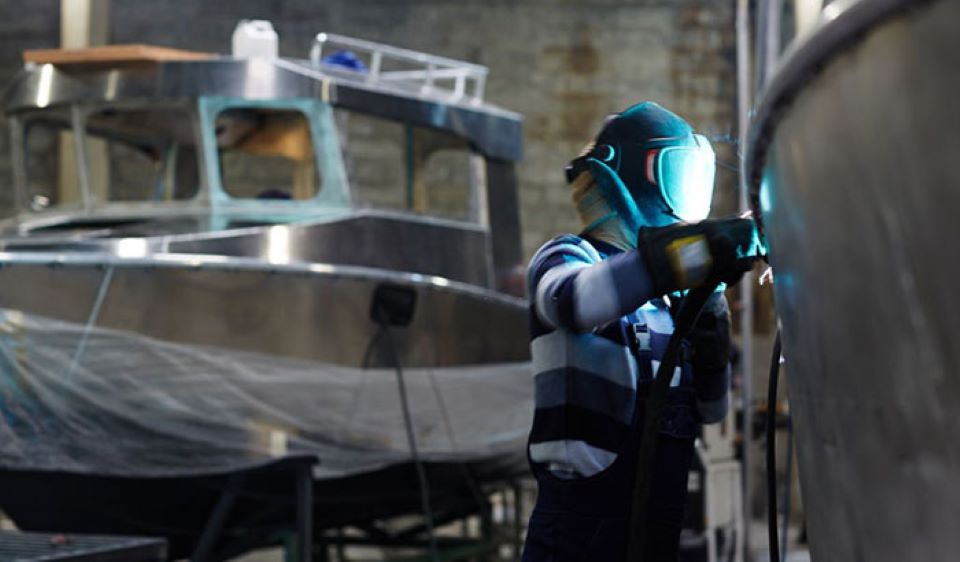
- Welding: This method is most suitable for larger or structural repairs. Welding involves using specialized equipment to heat and fuse aluminum pieces together. It requires proper training and expertise in welding techniques.
- Epoxy Sealing: Epoxy products designed specifically for sealing aluminum boats are widely available. These epoxy-based sealants offer excellent adhesion and waterproofing properties when applied correctly. They are particularly suitable for smaller leaks or cracks.
- Patching: If the damage is relatively minor, patches made from compatible materials can be used to cover the affected area. These patches often come with adhesive backing for easy application.
Common Repair Challenges and Solutions
Repairing a leaking aluminum boat can sometimes present challenges. However, with the right approach and solutions, these challenges can be overcome. Here are some common repair challenges and their respective solutions:
- Rust and Corrosion: In areas where aluminum is exposed to water, rust and corrosion can occur over time. This can weaken the structure of the boat and lead to leaks. To address this challenge, it is important to remove any rust or corrosion before applying repair materials. You can use sandpaper or a wire brush to scrub away the rust, ensuring that you reach bare metal. Once cleaned, apply a suitable primer or anti-corrosion treatment before proceeding with the repair.
- Difficult-to-Reach Areas: Some leaks may occur in challenging-to-reach areas of the boat, making repairs more complex. In such cases, it may be necessary to dismantle certain parts of the boat temporarily to gain access to these areas. Take careful notes or photographs during disassembly to ensure proper reassembly later on. It is also helpful to have a well-equipped toolbox containing tools specifically designed for working in confined spaces.
- Cosmetic Considerations: While repairing leaks is essential for maintaining the integrity of your boat, cosmetic considerations may also play a role. Aluminum boats often have powder-coated finishes or paint jobs that need protection during repairs. To prevent damage to these finishes, use masking tape or protective covers on adjacent surfaces before applying any repair materials.
Differences Between Repairing Aluminum vs. Fiberglass Boats
While we’ve focused on repairing aluminum boats so far, it’s worth noting some key differences between repairing aluminum boats and repairing fiberglass boats:
Aspect Aluminum Boats Fiberglass Boats Repair Materials Aluminum-specific patches, welding equipment, and epoxy sealants. Fiberglass resin, cloth or mat, gelcoat repair kits. Repair Techniques Welding for structural repairs; patching and sealing for minor leaks and cracks. Laminating with fiberglass cloth or mat for structural repairs; gelcoat repair for cosmetic damage.
In general, the choice between aluminum and fiberglass boats often comes down to personal preference and the specific needs of boaters. Both materials have their advantages and considerations when it comes to repairs. Understanding these differences will help you make informed decisions when addressing issues in your boat.
By being aware of common challenges that may arise during aluminum boat repairs and understanding the differences between repairing aluminum versus fiberglass boats, you can approach the repair process with confidence while ensuring optimal results. Adhering to proper repair techniques and utilizing suitable materials will help keep your aluminum boat in excellent condition for years to come.
Key Takeaways
- Identify the source of the leak by inspecting the hull.
- Prepare the surface by cleaning and removing debris.
- Select an appropriate repair method, such as welding or using epoxy-based products.
- Execute the repair process step by step, following safety precautions.
- Test and inspect for leakage to ensure successful repairs.
Remember to follow these key steps when repairing a leaking aluminum boat. Inspect, prepare, select, execute, and test to achieve effective repairs.
Frequently Asked Questions
Here are some common questions about repairing a leaking aluminum boat:
1. Can I use regular sealant to repair a leak in an aluminum boat?
No, using regular sealant may not provide a long-lasting solution for repairing leaks in an aluminum boat. It is essential to use sealants specifically formulated for aluminum to ensure proper adhesion and durability.
2. Is welding the best method for repairing large leaks in an aluminum boat?
Welding can be an effective method for repairing large leaks or structural damage in an aluminum boat. However, it requires proper training and expertise. For smaller leaks or cracks, alternative methods such as sealing with epoxy-based products or using patches may be more suitable.
3. How can I prevent future leaks in my aluminum boat after repairs?
To prevent future leaks, regular inspections are key. Routinely check the hull for signs of corrosion or damage and address any issues promptly. Applying a marine-grade sealant periodically to vulnerable areas can also help maintain the integrity of your aluminum boat.
4. Can I repair small leaks myself, or should I seek professional help?
If you have experience with boat repairs and feel confident in your abilities, you can attempt to repair small leaks yourself. However, if you are unsure or if the damage is extensive, it is wise to consult a professional who specializes in boat repairs to ensure proper and effective repairs.
5. What safety precautions should I take during the repair process?
Safety is paramount during any repair work on a boat. Always wear appropriate personal protective equipment (PPE), such as gloves and safety glasses. Ensure good ventilation when using adhesive or welding materials. Follow instructions carefully, and if you are uncertain about any step, consult an expert or professional.
Final Thought
In conclusion, repairing a leaking aluminum boat requires careful inspection, preparation, and selection of the appropriate repair method. Identifying the source of the leak is crucial to effectively address the issue. Cleaning and preparing the surface ensure optimal adhesion for repair materials.
By following step-by-step instructions and taking necessary safety precautions during the repair process, you can restore your boat’s integrity. Remember to test and inspect for leakage before applying preventive measures to avoid future leaks. Regular maintenance and inspections will help keep your aluminum boat in excellent condition for all your aquatic adventures.